
Common cleaning mistakes: choosing and using products well
In this article
Wiping disinfectant away too soon can stop it from working as intended. Keep the surface visibly wet for the contact time on the product label, typically several minutes; many disinfectants need 5 to 10 minutes, depending on the product. This is one of the common cleaning mistakes homeowners make, even when they’re careful about which product they use.
It’s easy to assume a quick spray and wipe is enough, especially when you want a room clean and ready to use. But effective cleaning takes more than speed: choose a product suited to the surface and follow its instructions.
Choose cleaners for different materials, use only the directed amount, allow disinfectants their stated contact time, and work from top to bottom. These practical steps help you clean thoroughly while reducing streaks, residue, and the risk of surface damage.
Key Takeaways
- Match the cleaner and method to the surface to reduce residue and avoid damage.
- Use only the amount of product needed; extra spray can leave streaks or attract dirt.
- Never mix cleaning products, and follow label directions for safe use.
- Give disinfectants the full contact time on the label before wiping them away.
- Work from higher surfaces down, leaving floors until last for a more efficient clean.
1. Choosing cleaners suited to each surface
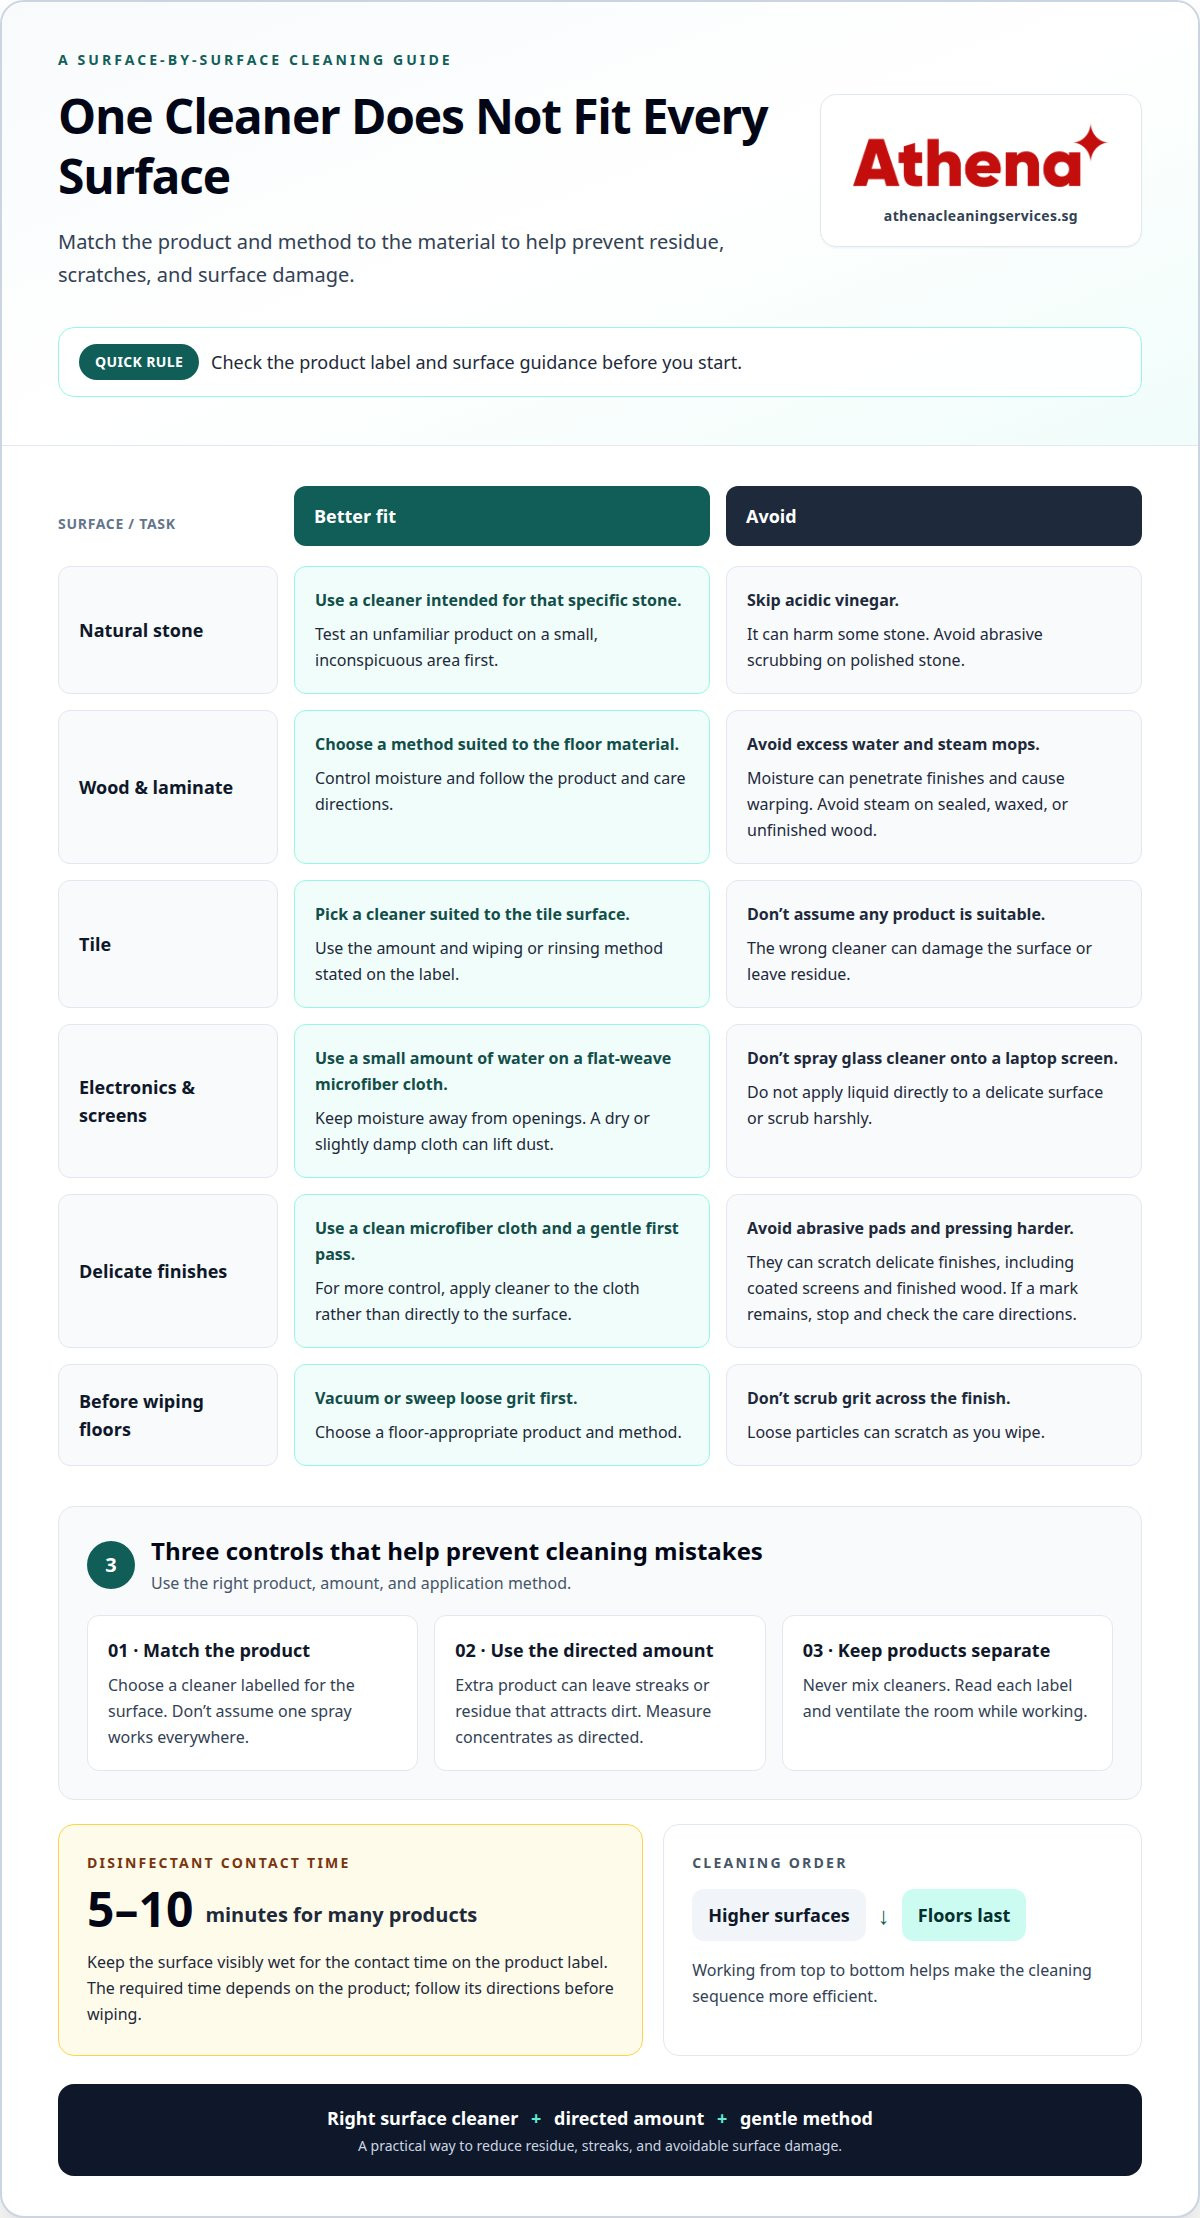
Natural stone, wood, laminate, tile, and electronics can all be damaged by unsuitable cleaners or tools. Acidic vinegar can harm some stone, bleach can damage porous surfaces, and abrasive pads can scratch delicate finishes. Match the product and method to the material before you start wiping.
For stone countertops, avoid vinegar and use a cleaner intended for the specific stone. On wood and laminate floors, avoid excess water and steam mops, which can let moisture penetrate finishes and cause warping. Tile also needs a suitable cleaner, as the wrong product can damage its surface or leave residue.
Electronics need a lighter touch. Don’t spray glass cleaner onto a laptop screen or apply liquid directly to a delicate surface. Instead, use a small amount of water on a flat-weave microfiber cloth, keeping moisture away from openings. A dry or slightly damp cloth can lift dust without harsh scrubbing.
Choose a product labelled for the surface you’re cleaning instead of assuming one spray works everywhere. A glass cleaner may not suit a laptop screen, and a general-purpose product may be unsuitable for natural stone. Read the label for material guidance and use the stated amount. Extra product can leave residue that attracts dirt.
How you apply a cleaner matters as much as which product you choose. For delicate surfaces, spray it onto a microfiber cloth, not directly onto the surface. This limits overspray and helps control the amount of liquid that reaches the finish. Test the product on a small, inconspicuous area first, especially if the material or finish is unfamiliar.
Avoid abrasive scrubbing on polished stone, coated screens, and finished wood. If a mark doesn’t lift with a gentle pass, stop rather than pressing harder or switching straight to a stronger chemical. Check that the cloth is clean, then follow the product label and the surface maker’s care directions where available.
Floors also need material-specific care. Vacuum or sweep loose grit before wiping, since particles can scratch the finish as you scrub. Choose a method suited to the floor type, control moisture on wood and laminate, and avoid steam on sealed, waxed, or unfinished wood. Similarly, over-saturating carpets with liquid cleaners can trap moisture deep within the padding; as specialists at Triangle Legacy Flood Restoration & Carpet Cleaning point out, controlled moisture extraction is essential to avoid long-term damage and mould growth. Mixing products won’t make an unsuitable cleaner safer. Use one appropriate product at a time.
These precautions address several common cleaning mistakes homeowners make: choosing products by habit, spraying too freely, and scrubbing harder when results are slow. A surface-specific cleaner, a clean microfiber cloth, and a gentle first pass help protect finishes while removing everyday soil. For homeowners seeking visual inspiration on how proper care preserves domestic interiors, viewing completed work by Apartment Clean demonstrates the high standard that deliberate, surface-safe techniques achieve.
2. Using too much cleaning product
More cleaner doesn’t necessarily mean a cleaner surface. Extra spray or solution can leave residue, create streaks, and attract dirt after the surface dries. For example, a countertop that feels tacky after wiping may have too much product left behind, rather than needing more cleaning effort.
Follow the label’s directions to measure the correct amount for the task. If it specifies dilution, add the stated amount of concentrate to water instead of estimating by eye. For ready-to-use sprays, start with a light application and add more only if the label allows it and soil remains.
Apply cleaner to a cloth when you need more control, especially on a small table or cabinet front. Wiping with a damp, product-coated cloth distributes the solution more evenly than repeatedly spraying the same spot. It also helps prevent cleaner from running into seams or pooling around edges.
After applying a product, follow its instructions for wiping or rinsing. A floor cleaner, for example, may leave a film if you use too much solution or don’t wipe as directed. If residue appears, don’t add another layer of cleaner. Follow the label’s guidance to remove excess safely.
Too much product can also make cleaning less efficient. Sticky residue collects dust and soil, so the surface needs attention again sooner. Repeatedly adding cleaner while wiping can spread residue over a wider area instead of lifting it. Use a clean cloth and change it when it becomes visibly soiled.
Professional cleaners follow product instructions and a consistent process instead of assuming stronger or heavier application works better. A task checklist helps keep the sequence clear: identify the surface, choose a suitable product, measure or apply the directed amount, then wipe or rinse as instructed. For example, a shared-office checklist can distinguish desks, floors, and touchpoints, so one product or cloth isn’t used everywhere.
At home, keep the product label within reach and measure concentrates with the cap or tool specified by the manufacturer. Don’t combine cleaners to compensate for using too little, or apply more when a mark needs a different method. Correct dosing supports thorough wiping without unnecessary residue or product waste.
When a larger cleaning task needs a consistent, methodical approach, professional cleaning support can help address the workload with a planned process.
3. What Are The Common Domestic Cleaning Mistakes To Avoid?
Cleaning safely starts with reading each product label and following its directions. Don’t mix cleaners, especially bleach with ammonia or vinegar, and ventilate the room while working. These steps reduce the risk of harmful fumes and help you use each product as intended.
Some common cleaning mistakes homeowners make include mixing chemicals, rushing through wiping, and using the wrong tool. In a bathroom or kitchen, using one cloth across several areas can also transfer dirt and germs. Keep separate, clean cloths for different tasks, and wash or replace them when soiled.
Never combine bleach and ammonia, because the mixture can create toxic fumes. Mixing bleach and vinegar produces chlorine gas, which can cause coughing, breathing problems, and burning, watery eyes even at low levels. Use one product at a time, keep containers separate, and follow the label instead of adding another cleaner to tackle a stubborn mark.
Stainless steel needs a gentle touch. An abrasive eraser sponge can scratch or dull the finish, so use a soft microfiber cloth and a suitable cleaner instead. Wipe in the direction of the grain where visible, and avoid pressing hard on greasy patches. A controlled, gentle pass protects the finish better than aggressive scrubbing.
Choose an overcast day to clean windows. Direct sun can dry the cleaner quickly and leave streaks before you finish wiping the glass. Apply the product as directed, work in manageable sections, and use a clean microfiber cloth to buff away any remaining marks.
Rushing can leave grime on overlooked spots such as light switches, kitchen cabinet fronts, and bathroom taps. Follow a short routine that gives each area attention instead of wiping visible surfaces and stopping. Include baseboards and appliance seals when your cleaning plan calls for them. Grease and dust are easier to tackle before they build up.
For mould, grease, or stubborn bathroom stains, use a product suited to the surface and follow its label. Avoid dry, forceful scrubbing or combining cleaners to intensify the result. Apply the product gently with a suitable cloth, let it work as directed, then wipe or rinse as instructed. If the stain remains, don’t escalate by mixing chemicals.
In Singapore homes, follow the product label’s use, dilution, and ventilation directions, and keep the room ventilated while cleaning. For light switches, use a cloth dampened with an appropriate product rather than spraying directly onto the electrical fitting. These simple steps make routine cleaning safer and more consistent.
4. Allowing disinfectants their required contact time
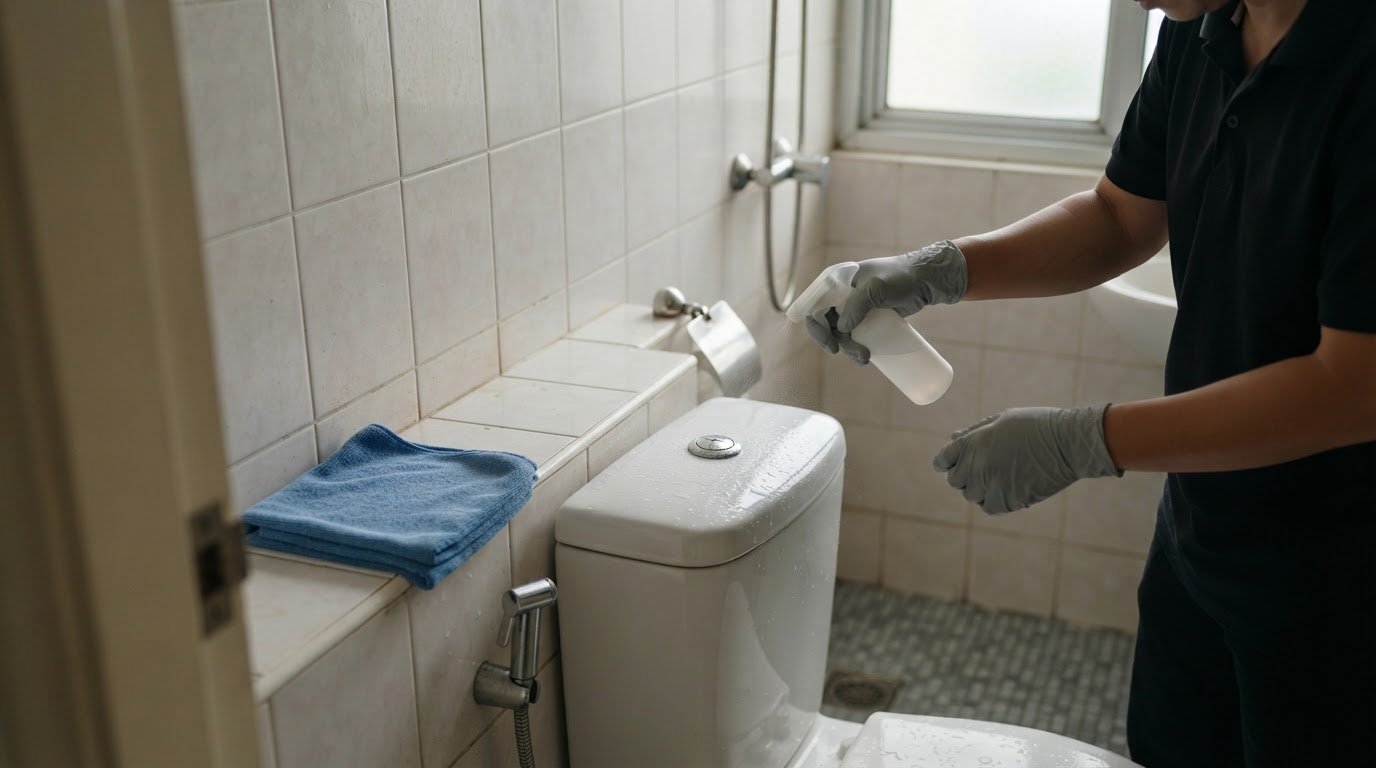
A disinfectant needs time on a surface to work as intended. Wiping it away immediately may prevent it from doing so, even if the area looks clean. Follow the contact time on the product label, and keep the surface wet for that entire period. The stated time varies by product; many disinfectants need 5 to 10 minutes.
Use the label as your timing guide, not a general rule remembered from another bottle. Products may need different dwell times even when both are intended to disinfect similar surfaces. Read the directions before starting, then apply enough product to keep the treated area visibly wet for the required time.
A kitchen sink shows why timing matters. After removing visible food residue, apply disinfectant to the basin, sides, and bottom as directed. If the label calls for several minutes of contact, don’t start wiping before that time is up. A quick pass may remove the product before it has had the time specified by the manufacturer.
Plan the task around the dwell time. Treat one section of the counter, then use the waiting period to prepare the next area without wiping the first one early. In a bathroom, clean a separate fixture while disinfectant remains on a tap or sink surface. This sequence helps you disinfect thoroughly without standing over one spot.
Watch for drying. A disinfectant that dries before its contact time is complete may not meet the label’s directions. Reapply only as instructed, and don’t assume a second spray automatically restores the required time. Keep the label nearby for specific guidance on wetness, wiping, and rinsing.
Contact time also depends on how you prepare the surface. Dirt, grease, and food debris can interfere with cleaning, so remove visible soil first when the product directions call for it. Then apply disinfectant evenly across the area. A missed strip on a handle or counter edge won’t receive the same treatment as the rest.
Don’t assume a strong smell or bleach-based formula means faster results. The label’s stated time still matters, and chemicals should never be mixed to speed up disinfection. Use disinfectant where needed, while distinguishing routine cleaning from disinfection: cleaning removes soil, then disinfecting requires the directed contact period.
When the surface is ready, finish by wiping or rinsing exactly as the label instructs. The final step can differ between products, so don’t shorten the contact time or skip the specified finish. A measured wait, a fully covered surface, and label-led wiping make disinfection more dependable.
5. Cleaning from top to bottom
Start with ceiling fans, the tops of door frames, and high shelves, then move down to furniture and floors. Dust from a fan or frame can settle on surfaces below. If you vacuum or mop first, that fallen dust dirties the floor again and adds another step.
Use a repeatable room sequence: clear high dust, wipe furniture and other surfaces, then finish with the floor. For example, dust a bedroom fan and wardrobe top before wiping bedside tables. Use a clean cloth for each area and change it when it collects visible dirt. This helps prevent debris from being transferred between surfaces.
Vacuum after dusting, not before. Vacuuming collects loosened dust, hair, and crumbs that have fallen from furniture or baseboards. Then mop if the floor material allows it. This order avoids undoing vacuuming with later dusting and leaves the floor clean after higher surfaces.
Work from cleaner areas toward dirtier ones within a room. Wipe a lightly dusty shelf before tackling a greasy kitchen surface, and use a fresh cloth when you change tasks. In a bathroom, clean less-soiled surfaces before the toilet area. This sequence limits the spread of grime and keeps cloths from carrying soil back to cleaner spots.
Remember overlooked high and low points. Ceiling fan blades, the tops of door frames, shower tracks, baseboards, and spaces under appliances can collect dust, hair, or moisture. Add these places to your room routine instead of focusing only on visible tabletops. In the kitchen, include the floor beneath movable items when it’s safe to reach.
Don’t go straight to the floor just because it looks like the biggest task. First remove loose debris from shelves and furniture, then vacuum the whole room, including accessible edges. If you wet-clean the floor, vacuum first to avoid dragging grit across it. Finish with the floor and let it dry before returning moved items.
A planned order is useful for a single room or a full-home cleaning service. If you forget a ceiling fan or dust a surface after vacuuming, simply clean the affected area and vacuum the floor again. For help keeping a larger space consistently clean, consider a professional cleaning service with a methodical room-by-room approach.
Athena Team Cleaning
Turn to the team when routine upkeep is becoming difficult to manage or when carpets and rugs need focused attention. These services support a consistent cleaning approach, with care tailored to the task and space.
Carpet and Rug Cleaning and Sanitization Services can address specific cleaning priorities. Choose the service that best matches the areas you need help maintaining.
For a practical next step, contact Athena Team Cleaning to discuss your cleaning needs.
Build a cleaning routine that lasts
Make your next cleaning session easier to maintain by choosing a manageable routine for your home. Start with the areas that see the most daily use, then adapt your approach as needs change. A plan that fits your household is more useful than an ambitious schedule that’s difficult to sustain.
Avoiding common cleaning mistakes homeowners make is an ongoing practice, not a one-time reset. Notice which tasks repeatedly take longer or leave unsatisfactory results, then adjust your sequence, tools, or product use. Small refinements can make future cleaning more deliberate and help you care for your space with confidence.
If cleaning demands are taking time away from other priorities, professional support can help you maintain a well-kept environment. Contact Athena Team Cleaning today to discuss your needs and take a practical next step.
Keep the surface wet for the contact time stated on the disinfectant label. Many products need 5 to 10 minutes, but the required time varies by product. For a small area such as a tap handle, cover the whole surface and use a timer if needed. If the product dries before the time is up, follow its label for what to do next rather than assuming the treatment is complete.
How often should I clean my home to avoid buildup?
Set a routine that matches how each space is used. Short daily tasks of 15 to 30 minutes, paired with weekly zone cleaning, can help prevent chores from accumulating into one demanding session. Consider a deeper clean monthly or quarterly, depending on household use. For example, a busy kitchen may need frequent attention to counters, while less-used rooms can follow a lighter routine.
What Are The Common Domestic Cleaning Mistakes To Avoid?
Common errors include using a cleaner that doesn’t suit the surface, applying more product than directed, mixing chemicals, and rushing through wiping. Another is cleaning in an order that lets dust settle on areas you’ve already finished. For example, wiping a dining table after vacuuming can leave fresh dust on the floor. A planned sequence and task-appropriate tools help you avoid redoing work.
What areas do homeowners most often forget to clean?
Remember spots outside eye level or your usual reach: ceiling fans, the tops of door frames, baseboards, shower tracks, and areas under appliances. Kitchen cabinet fronts, backsplash tiles, and appliance seals can also collect grease. Add an overlooked spot to your regular room routine, such as checking the refrigerator seal while wiping kitchen surfaces, so buildup doesn’t go unnoticed.
Which household cleaning products should never be mixed, and what are the risks?
Never mix bleach with ammonia or vinegar. Bleach and ammonia can create toxic fumes, while bleach and vinegar produce chlorine gas that can cause coughing, breathing problems, and burning, watery eyes even at low levels. Use one product at a time and keep its container separate from other cleaners during the task. If you’re unsure whether products can be combined, don’t mix them.
How much cleaning product should you use, and can using too much leave residue?
Use the amount and dilution directed on the product label. Extra spray or solution can leave streaks or a film that attracts dirt, so adding more doesn’t necessarily improve the result. For a small tabletop, apply a light amount as instructed and spread it evenly with a clean cloth. Measure concentrate dilution instead of estimating, then follow the label’s wiping or rinsing directions.
How should cleaning cloths, sponges, and vacuum filters be washed or replaced?
Clean mop heads and microfiber cloths after use, and follow their care instructions. Clean kitchen sponges at least once a week, disinfect sponges daily, and replace dish sponges every one to two weeks. Empty the vacuum after every 2 or 3 cleaning sessions. For vacuum filters, follow the vacuum maker’s care instructions, since washing methods depend on the filter.
Frequently Asked Questions
How long should disinfectants sit on a surface?
How often should I clean my home to avoid buildup?
What Are The Common Domestic Cleaning Mistakes To Avoid?
What areas do homeowners most often forget to clean?
Which household cleaning products should never be mixed, and what are the risks?
How much cleaning product should you use, and can using too much leave residue?
How should cleaning cloths, sponges, and vacuum filters be washed or replaced?
Looking for help? See our house cleaning service in Singapore.
Related articles