

How to Clean Greasy Kitchen Floors Safely and Effectively
In this article
- Key Takeaways
- Table of Contents
- Why Kitchen Floors Get Greasy, and Why a Quick Mop May Not Work
- Choose a Grease-Cleaning Method That Suits Your Floor
- Do You Need Strong Chemicals to Remove Grease?
- How to Clean Greasy Kitchen Floors Step by Step
- When Routine Cleaning Is Not Enough: A Professional Kitchen-Cleaning Option
- Make a Cleaner Kitchen Easier to Maintain
- Frequently Asked Questions
What if a stronger cleaner is the reason your kitchen floor still feels greasy? Too much product, or a cleaner that does not suit the surface, can leave a sticky film that attracts grime and makes the floor slippery. If you’re wondering how to clean greasy kitchen floors without dulling or damaging the finish, match your method to the flooring material instead of reaching straight for a harsher degreaser.
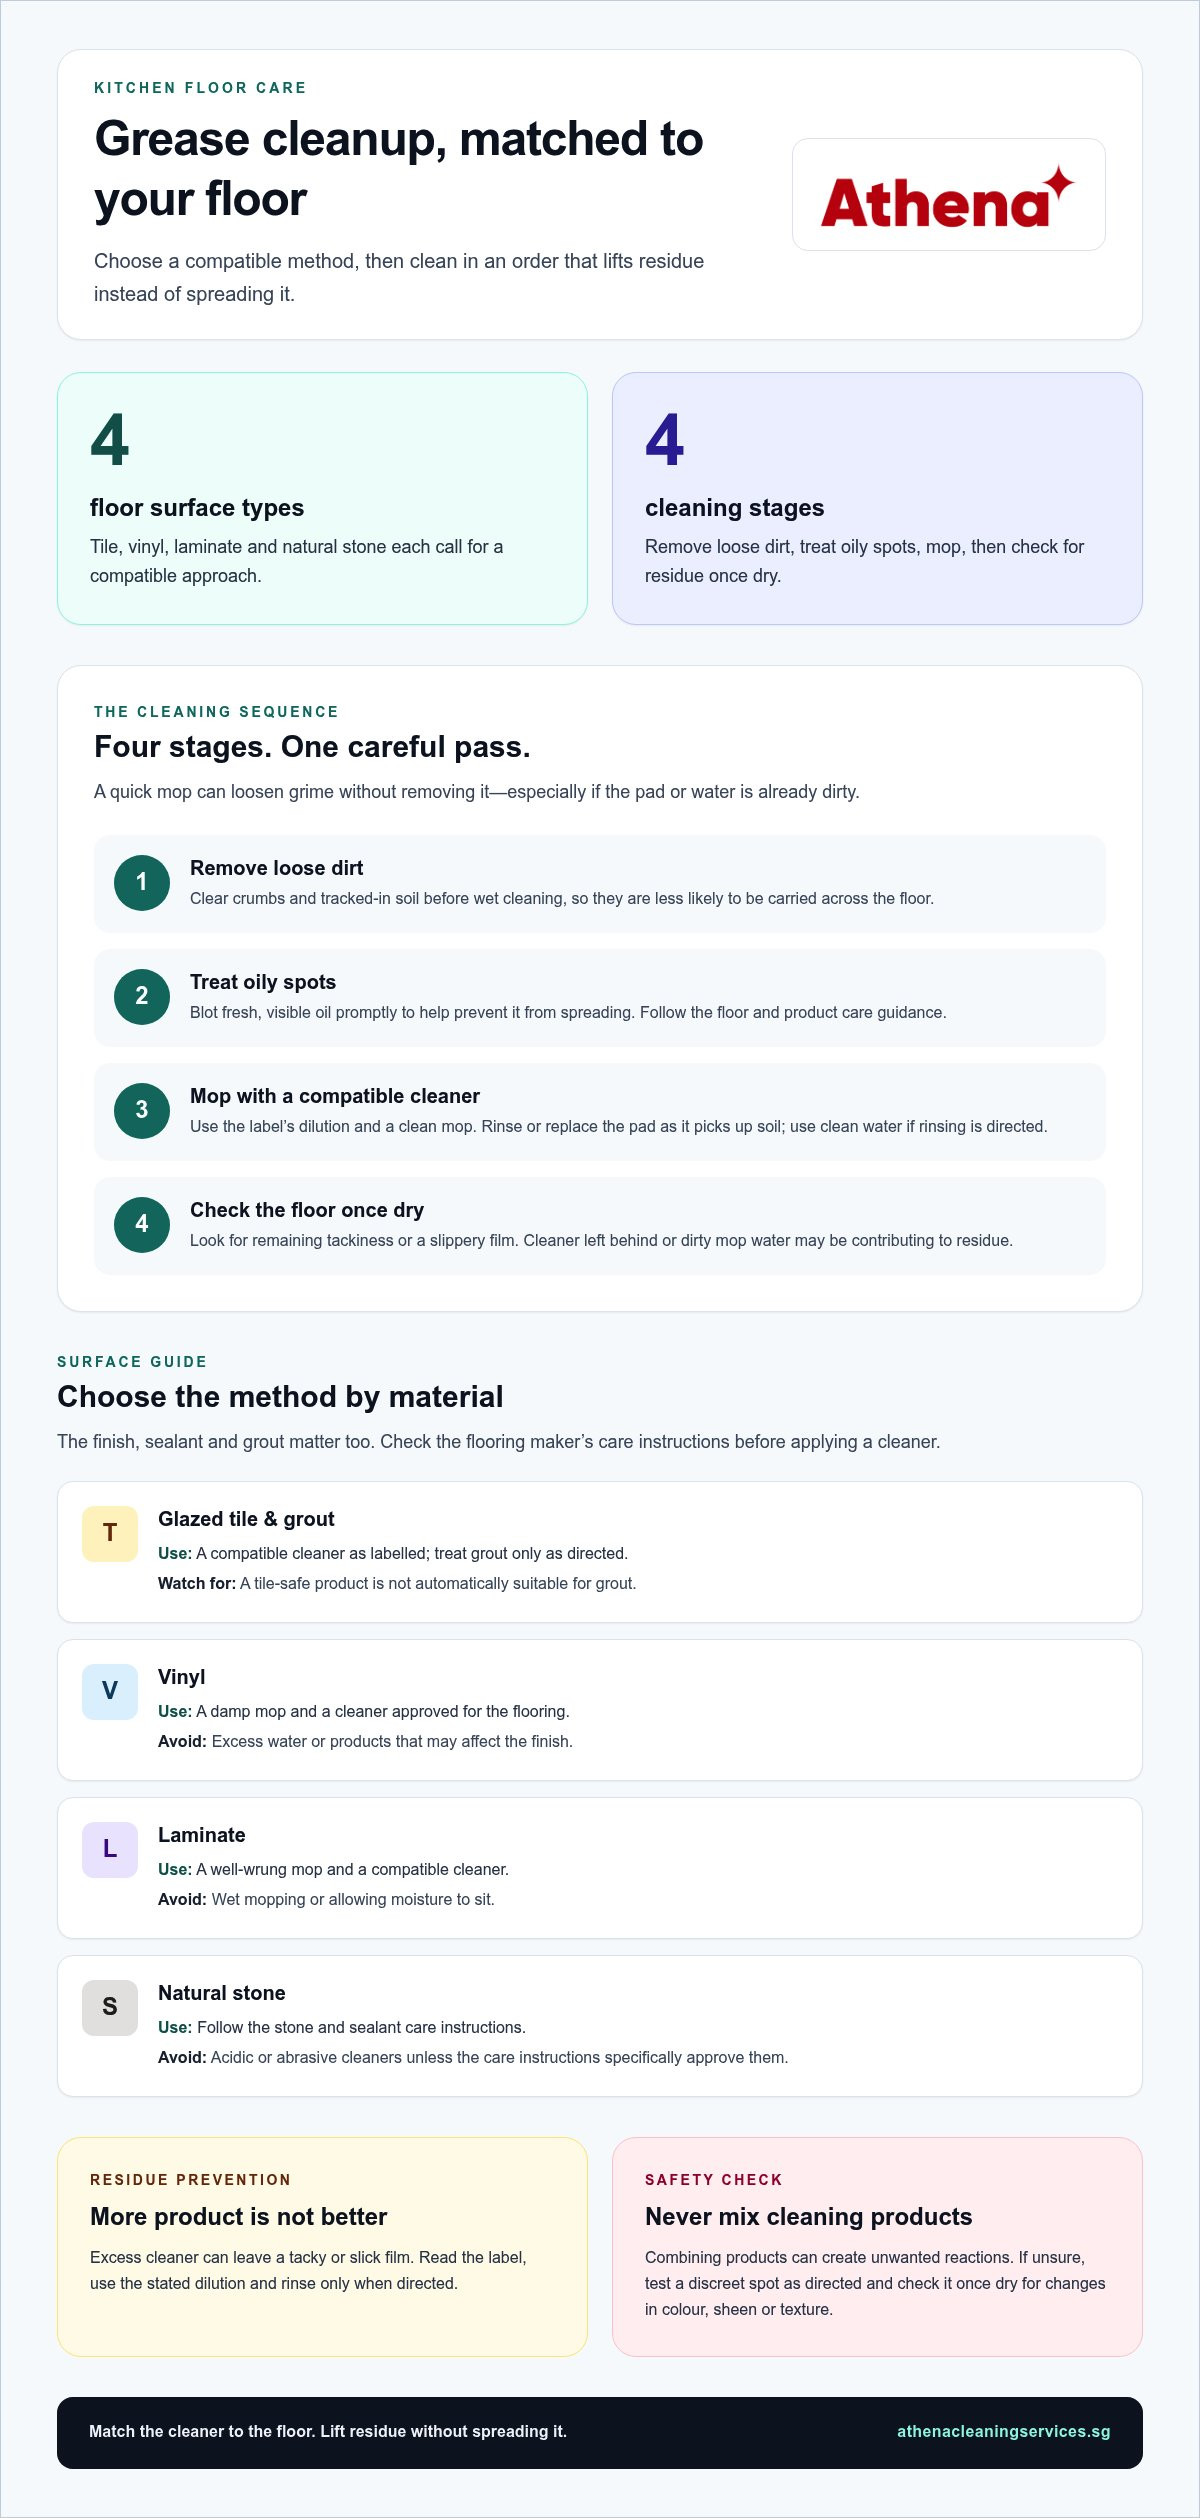
Grease that seems to return after mopping is frustrating, especially when you’re unsure which products are safe for your floor. The right sequence is straightforward: remove loose dirt, treat oily spots, mop with a compatible cleaner, and check for residue once the floor is dry. This guide explains how to avoid spreading grease, why popular DIY ingredients such as vinegar can be risky on some surfaces, and when recurring buildup may call for professional cleaning. The goal is a cleaner, safer floor with its finish protected.
Key Takeaways
- Cooking oils and tracked-in soil can spread during mopping, leaving floors tacky again soon after cleaning.
- Learn how to clean greasy kitchen floors with a step-by-step routine that lifts loose debris before treating oily spots and mopping.
- Use a cleaner suited to your flooring, follow its care guidance, and avoid excess product that can leave a slippery film.
- Recognise when recurring grease or a floor finish needing specialist care calls for professional kitchen cleaning rather than more scrubbing.
Why Kitchen Floors Get Greasy, and Why a Quick Mop May Not Work
A freshly mopped kitchen floor should feel clean, not tacky underfoot. If stickiness returns quickly, a stronger cleaner may not be the answer. Greasy residue combines cooking oils with soil left on the surface or spread across it. A quick pass can loosen grime without removing it, especially when the mop pad or water is already dirty.
Frying splashes, dropped food, and soil tracked through the cooking area all add to the film. Incomplete rinsing can also leave cleaner behind, making the floor feel slippery or attracting more dirt. For an overview of how products designed to tackle oily soils work, see Degreaser. A cleaner’s strength alone does not determine whether it is suitable or effective. The floor’s material and finish matter just as much.
How cooking grease builds up on kitchen flooring
Fresh oil is usually visible in a small area, so blotting it promptly can help prevent it from spreading. Older residue is less obvious. Repeated splashes mix with fine crumbs and tracked-in soil, forming a dull or sticky layer. If a damp mop is not rinsed or refreshed, it can carry that mixture from one area to another. Buildup may need more than one gentle cleaning pass. Aggressive scrubbing can damage the finish without lifting the film effectively.
Why the floor material changes the cleaning approach
Sealed tile, vinyl, laminate, and natural stone do not all respond to the same products or amount of moisture. A cleaner tolerated by sealed tile may be unsuitable for a particular stone, sealant, or floor finish. Vinyl and laminate also have specific care requirements, so do not assume that a product labelled “for hard floors” is suitable for every surface. Check the flooring maker’s guidance before applying a cleaner, and test a discreet spot if the instructions allow it.
Identify the surface first, because the right grease-cleaning method depends on the floor’s material and finish. To clean greasy kitchen floors safely, use a compatible product as directed. Do not compensate for uncertainty by choosing a stronger formula or scrubbing harder. If residue remains, consider whether dirty mop water or cleaner left behind is contributing before repeating the process. This careful approach helps protect the finish and remove loosened grease instead of redistributing it.
Choose a Grease-Cleaning Method That Suits Your Floor
The right cleaner lifts grease without harming the surface or leaving a film. A mild detergent solution may suit some floors and light residue, but use it sparingly and rinse if the directions call for it. A labelled floor cleaner may provide clearer guidance on suitable surfaces and dilution. Still, “for hard floors” does not mean it is appropriate for every finish. Follow the flooring maker’s care instructions before choosing either method.
If you are unsure how a product will behave, apply it to a small, inconspicuous area according to its label. Once the spot is dry, look for changes in colour, sheen, or texture. Do not use the product across the floor if you notice a change.
What to consider for tile, vinyl, laminate, and natural stone
Floor type is a useful starting point, but the finish and grout matter too. Glazed tile and grout may need different care, so follow product directions for both. Vinyl and laminate generally call for a damp, not wet, approach and a cleaner suited to the finish. Natural stone needs particular care: avoid acidic or abrasive products unless the stone’s care instructions specifically approve them.
| Surface | Cautious method | Avoid |
|---|---|---|
| Glazed tile and grout | Use a compatible cleaner as labelled; treat grout only as directed. | Assuming a tile-safe product is also suitable for grout. |
| Vinyl | Use a damp mop and a cleaner approved for the flooring. | Excess water or products that may affect the finish. |
| Laminate | Wipe with a well-wrung mop and a compatible cleaner. | Wet mopping or allowing moisture to sit. |
| Natural stone | Follow the stone and sealant care instructions. | Unapproved acidic or abrasive cleaners. |
How to select a cleaner without damaging the finish
Read the label before mixing or applying a product. Confirm that your floor type is listed, use the stated dilution, and check whether the surface needs rinsing. More concentrated is not necessarily more effective. Excess product can leave residue that feels tacky or slick. Never combine cleaning products, since mixing them can create unwanted reactions and make the solution harder to use safely.
Use a clean microfiber mop or cloth, and rinse or replace it as it picks up soil. A dirty pad can spread oily residue instead of removing it. If the product instructions call for rinsing, use clean water and a fresh mop head to lift away remaining cleaner. Careful product selection is central to cleaning greasy kitchen floors while protecting the finish.
If residue persists despite careful routine cleaning, professional kitchen cleaning and sanitation can help with the broader cleaning task. Explore professional cleaning support as a practical next step.
Do You Need Strong Chemicals to Remove Grease?
Not necessarily. A stronger formula or more forceful scrubbing may seem like the quickest fix, but it can damage a sensitive finish without solving the problem. Results depend on using a cleaner suited to the floor, measuring the dilution as directed, and removing loosened soil rather than spreading it around. Too much product can leave a film that feels tacky or slick, even after the original grease has lifted.
Never mix cleaning products, and always follow their labels. Combining products can create hazardous reactions. Using a concentrated solution or leaving it on longer than directed may also affect the floor. Use one compatible product at a time, following its instructions for application, rinsing, and ventilation.
When a degreaser may help, and when it may harm
A labelled degreaser that specifically lists your floor type may help with stubborn greasy soil that a gentle routine has not removed. Its suitability matters more than how powerful it sounds. An incompatible formula can dull, discolour, or otherwise alter a sensitive finish. Follow the floor maker’s care guidance and the product directions, and test the cleaner on a small, inconspicuous patch first. Stop if the spot changes in appearance or texture.
Let the test area dry before judging the result, since a wet surface can temporarily look different. Do not increase the concentration or scrub harder to force a result. That could turn a cleaning problem into finish damage, particularly if the product was not designed for the surface.
How to tell grease from cleaner residue
Notice where the tackiness appears. A localised oily patch near a cooking area may point to a fresh spill. A similar film across much of a recently mopped section may indicate excess cleaner or incomplete rinsing. These clues are not definitive, but they can help you avoid adding another layer of product before identifying what remains.
If the flooring care instructions permit it, try a pass with clean water and a fresh, well-wrung mop or cloth to lift remaining solution. Keep moisture within the floor’s recommended limits, especially on surfaces that should not get wet. Let the area dry fully, then check whether the sticky or slick feeling has eased. If it has not, do not keep repeating the same process.
Applying more cleaner without removing what is already there can add film instead of improving the result. Refresh the mop water and use a clean pad so loosened soil and product are not carried back across the floor. If you are learning how to clean greasy kitchen floors, remember that persistent tackiness after mopping may call for residue removal, not a harsher degreaser. When careful cleaning still leaves buildup, routine mopping may not be enough to address the floor-care issue.
How to Clean Greasy Kitchen Floors Step by Step
A reliable clean depends on the order of the work: remove loose soil first, treat concentrated grease carefully, then mop with a compatible cleaner. Before you begin, check the floor’s care instructions and the product label. Use only a cleaner suited to the surface, mixed at its stated dilution. Keep the mop damp rather than wet if the flooring instructions call for limited moisture.
- Clear and prepare the area. Move chairs, bins, mats, and other movable items so you can clean the full floor without pushing grease around obstacles. Keep people and pets away from the wet area to reduce slipping risk. Gather a clean mop or microfiber pad, clean water, and the selected floor-compatible cleaner.
- Remove loose debris and fresh oil. Pick up crumbs and food scraps before mopping so they do not turn into a gritty smear. For a fresh oil spill, gently blot with an absorbent cloth or paper towel. Avoid rubbing, which can spread the oil. Dispose of the oily material rather than rinsing it into the mop water.
- Test and spot-treat concentrated grease. If you have not already tested the cleaner, apply it to a discreet area following the label, then check the dry surface for changes. If the patch looks or feels different, stop and do not use that product on the floor. For a suitable cleaner, follow its spot-treatment directions, including any guidance on how long it should remain on the surface.
- Mop in manageable sections. Dilute the product exactly as directed and use a clean mop. Work from the farthest part of the kitchen toward the exit, moving steadily so you do not trap yourself behind a wet area. Rinse or replace the pad as it collects soil, and refresh dirty solution instead of spreading it over the next section. Avoid scrubbing hard; let the compatible cleaner work as directed.
- Rinse only as instructed, then dry. If the product label or floor-care instructions call for rinsing, make a separate pass with clean water and a fresh, well-wrung mop. Do not add extra water if the floor should not be wet-cleaned. Dry the surface thoroughly with a clean cloth or allow it to air-dry, while keeping foot traffic away until it is no longer wet.
Remove soil, clean gently, rinse as directed, and dry thoroughly. This sequence helps lift grease while reducing the chance of cleaner buildup and slippery patches. If residue keeps returning despite careful routine cleaning, kitchen sanitation can be a practical next step. Arrange professional kitchen cleaning for support with a thorough clean.
When Routine Cleaning Is Not Enough: A Professional Kitchen-Cleaning Option
Sometimes the issue is not a missed spot. If sticky residue keeps returning after careful cleaning with a suitable product and clean equipment, accumulated soil or a surface-care concern may be beyond routine mopping. A floor that looks dull, discoloured, or otherwise changed also calls for caution. Repeated DIY experiments could worsen the finish, so pause before trying a stronger cleaner or a more abrasive method.
Signs it may be time for more than another mop
Look for residue that remains after the floor has dried, recurring tackiness across cleaned areas, or visible changes in the finish. These signs do not identify the exact cause, but they are good reasons to stop repeating the same cleaning attempt. If regular kitchen cleaning no longer leaves the surface comfortable and clean, professional cleaning can help address the broader task with care.
Routine kitchen sanitation focuses on cleaning food-preparation areas and everyday surfaces. Floor restoration is different: it concerns the floor’s finish and may involve specialised maintenance, such as polishing parquet or marble. Cleaning and restoration are not interchangeable. Professional cleaning can help reduce the burden of recurring kitchen-floor care, while a finish concern calls for an approach suited to that surface. No cleaning method should be assumed to restore a finish without assessing what it needs.
If you are comparing options, the professional cleaning company buyer’s guide can help you understand what to consider when arranging professional support. Distinguish routine cleaning from specialised floor maintenance so the work you choose matches the issue you are addressing.
Keep kitchen floors cleaner between deep cleans
Small habits can make regular upkeep more manageable. Wipe cooking splashes promptly using a method suitable for your floor, and pick up crumbs before they are tracked across the kitchen. Use clean mop pads, and refresh the water when it becomes visibly dirty instead of carrying collected soil across the rest of the floor. These steps do not replace deeper attention when buildup persists, but they can help limit repeat residue between cleans.
Learning how to clean greasy kitchen floors also means recognising when to stop experimenting. If residue persists or the finish has changed, Athena Team Cleaning’s residential cleaning and kitchen sanitation services can help with maintaining a cleaner kitchen. Arrange professional residential cleaning for support with recurring kitchen upkeep.
Make a Cleaner Kitchen Easier to Maintain
A kitchen floor is easier to care for when cleaning is part of a steady routine rather than a response to stubborn buildup. Notice which areas collect the most splashes or foot traffic, and include those spots in regular upkeep. When deciding how to clean greasy kitchen floors, let the surface’s care guidance lead your choices. Avoid escalating to stronger products if the finish or residue gives you reason to pause.
If keeping up feels like one more task in an already full week, professional support can help take some pressure off. Athena Team Cleaning provides residential cleaning, with online quote requests and flexible scheduling to help you plan around your needs. A cleaner, more comfortable kitchen starts with a manageable next step.
Explore Athena Team Cleaning’s residential cleaning services and make room for a fresher, easier-to-maintain home.
Frequently Asked Questions
Can I use dish soap to clean a greasy kitchen floor?
Sometimes, but only if your flooring care instructions allow it. A small amount of diluted dish soap may help lift light cooking residue on a compatible surface, but dish soap is not necessarily formulated for floors. Too much can leave a slippery film. Test a discreet spot first, use very little, and follow any rinsing guidance. If the floor maker recommends a specific cleaner, use that instead.
Is vinegar safe to use on every type of kitchen floor?
No. Vinegar is acidic, so it can dull or damage some natural stone, including marble, and may affect certain floor finishes. Do not assume a popular DIY recipe is suitable just because it is commonly used at home. Check the flooring manufacturer’s care instructions before applying vinegar, even in diluted form. If you cannot verify that it is safe for your surface, choose a compatible cleaner instead.
Why does my kitchen floor feel sticky after mopping?
A sticky feel can come from cleaner left behind, too much product, or grease that has been spread instead of lifted. Consider where the tackiness appears. If the whole area feels sticky after mopping, cleaner buildup may be a factor. If the stickiness is localised near the cooker, oil may remain. To clean greasy kitchen floors without adding more film, first work out which pattern you are seeing.
Can baking soda scratch or damage kitchen flooring?
It can, depending on the surface and how it is used. Baking soda is a powder, and rubbing it as a paste may be abrasive on some finishes, polished surfaces, or softer materials. Do not use it as a scrub without checking the floor maker’s guidance. If the instructions do not approve it, choose a compatible liquid cleaner and a soft cloth rather than risking visible scuffs or dull patches.
How often should I mop a kitchen floor to prevent grease buildup?
There is no one schedule that suits every kitchen. Cooking frequency, spills, and foot traffic all affect how quickly grime accumulates. Wipe oily splashes promptly and remove crumbs before they are tracked around. Mop when the floor needs it, using a method suited to its material. A quick visual check around the cooker and sink can help you spot residue before it spreads.
What should I do if a greasy floor is still slippery after cleaning?
Keep people off the area until it is dry, and do not apply more cleaner straight away. Check whether the product directions or floor-care instructions allow a clean-water wipe, then use a fresh cloth or mop if permitted. Dry the floor and reassess. If it remains slick, avoid walking across it and stop experimenting with products. Persistent slipperiness may need a more careful assessment of the residue or finish.
Can I use a steam mop on a greasy kitchen floor?
Only if both the flooring manufacturer and the steam-mop instructions explicitly permit use on that surface. Heat and moisture may harm some floors, seams, sealants, or finishes, so do not assume the appliance is suitable for every hard floor. This is especially important if you are unsure what material or finish you have. If approval is unclear, use a care-approved method instead of steam.
Frequently Asked Questions
Can I use dish soap to clean a greasy kitchen floor?
Is vinegar safe to use on every type of kitchen floor?
Why does my kitchen floor feel sticky after mopping?
Can baking soda scratch or damage kitchen flooring?
How often should I mop a kitchen floor to prevent grease buildup?
What should I do if a greasy floor is still slippery after cleaning?
Can I use a steam mop on a greasy kitchen floor?
Related articles