
Pre-move in cleaning checklist for fresh floors and sanitised surfaces
In this article
A spotless start is easier when cleaning is done before the boxes arrive. A practical pre-move in cleaning checklist covers bathrooms, bedrooms, the kitchen and living areas, plus floors, carpets and high-touch points such as doorknobs. Inspect the home first, then clean from higher surfaces down to the floors so dust and debris don’t undo your work.
Moving into a new home brings plenty to organise, so a room-by-room plan makes cleaning more manageable. Use this checklist to prepare each space, clean frequently handled surfaces and give floors and carpets the attention they need before furniture fills the rooms. These practical steps cover bathroom fixtures, kitchen appliances, bedroom windows and living areas, helping you create a fresh, comfortable place to settle in.
Key Takeaways
- Inspect the bathroom before cleaning, then disinfect the toilet and pay attention to damp areas and signs of mould.
- Clean bedroom windows and fixtures before finishing with the floor, so dust and residue can be removed in the final pass.
- Refresh kitchen appliances and surfaces, including the refrigerator, dishwasher filter and sink drain.
- Vacuum living-area floors and carpets, and disinfect doorknobs and other frequently handled surfaces before unpacking.
- For professional carpet care or sanitisation, Athena Team Cleaning offers Carpet and Rug Cleaning and Sanitization Services.
Bathroom cleaning and mould prevention
Inspect the home before unpacking cleaning supplies. Photograph visible mould, pests, leaks or water damage, and record where each issue appears. This gives you a clear reference if a stain returns after cleaning or a damp patch grows.
Work from higher surfaces down to the floor. Dust exhaust grilles, shelves, light fittings and the top edges of shower screens first. Then clean mirrors, taps, basins and counters before tackling the toilet and floor. This order stops loosened dust and splashes from landing on surfaces you’ve already cleaned.
- Remove loose hair and debris from the basin and shower drain, because buildup can slow water flow.
- Apply a suitable bathroom cleaner to taps, handles, and the basin, then wipe away residue.
- Scrub grout lines with a small brush, especially where shower tiles meet corners.
- Clean the toilet bowl, seat, lid, flush button, and surrounding base, using separate cloths where practical.
- Finish with the floor, paying attention to the area behind the toilet and beside the vanity.
In a new home’s bathroom, disinfect the toilet and consider replacing the seat. Check the hinge area and underside, where grime can escape a quick wipe. Use products according to their labels, and let cleaned surfaces dry before putting down bath mats or storing items.
To limit recurring mould, inspect silicone seals, grout and ceiling corners for dark spots or dampness. Clean suitable hard surfaces with an appropriate product, then dry them thoroughly. If mould keeps returning, spreads beyond a small area or appears alongside water damage, arrange a professional assessment rather than covering it with paint.
For routine bathroom cleaning, handle visible surfaces, drains and grout with household tools. Leave extensive mould, persistent dampness or concealed water damage to professionals equipped to assess the cause and scope.
For Singapore homes, follow cleaning-product labels and building instructions for disposing of empty containers or unwanted chemicals. Don’t pour concentrated products down a drain, and never combine cleaners.
During the final inspection, check behind the toilet, beneath the basin, around tap bases, inside shower tracks and along grout edges. These tucked-away spots can hold dust, hair, soap residue or moisture even when the main surfaces look clean.
A practical pre-move in cleaning checklist covers inspection, dusting, fixture cleaning, attention to drains and grout, toilet disinfection and floor cleaning. Complete one bathroom before moving to the next to keep supplies and cloths organised.
Cleaning time depends on the bathroom’s size, condition and number of fixtures, not a fixed duration. A dry, lightly soiled bathroom needs less work than one with heavy soap deposits, blocked drains or recurring mould.
For chemical and mould safety, ventilate the bathroom, wear suitable gloves and follow each product label. Keep cleaners separate, never mix them, and don’t handle suspected pests or damaged materials with bare hands.
Bedroom windows, fixtures, and flooring
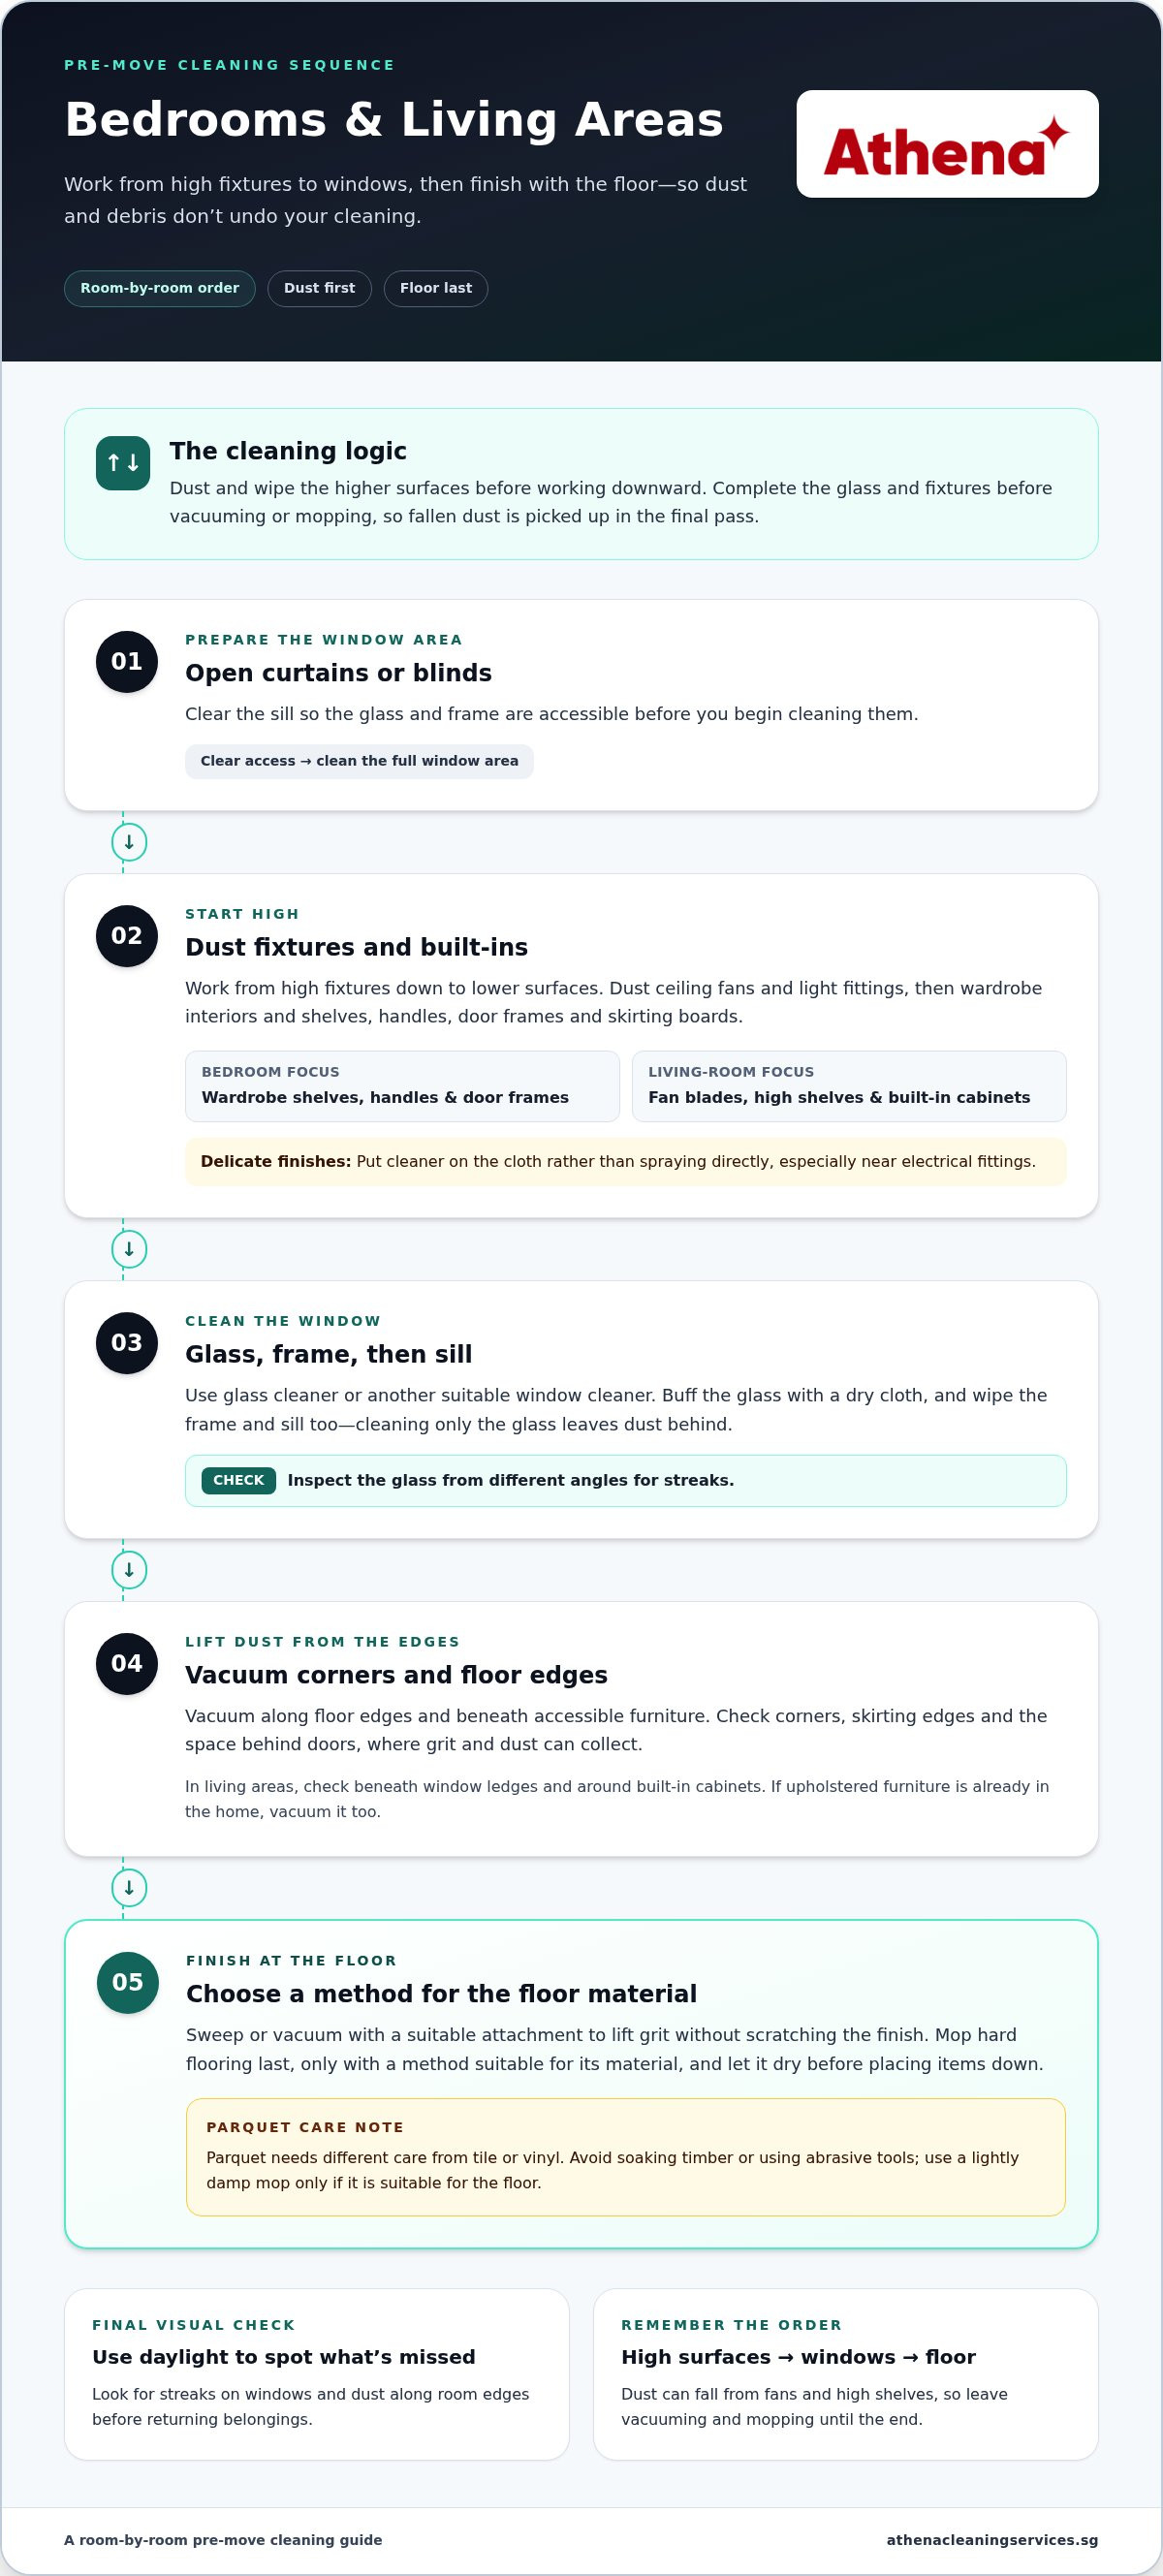
In each bedroom and living room, remove dust before wiping surfaces. Check window glass, frames, sills, light switches, ceiling fans and built-in shelves. These areas collect visible dust and fingerprints, especially around handles and edges. Clean windows with glass cleaner or another suitable window cleaner, then buff away streaks with a dry cloth. Wipe the frame and sill too, since cleaning only the glass leaves dust behind.
Work from the highest fixtures down. Dust ceiling fans and light fittings, then wipe wardrobe shelves, handles and door frames. Use a clean cloth on switches and other touchpoints. For delicate finishes, apply cleaner to the cloth rather than spraying directly. This helps keep liquid away from electrical fittings and prevents excess product from dripping onto freshly cleaned surfaces.
Follow this room-by-room sequence to keep the work organised:
- Open the curtains or blinds and clear the window sill, so the glass and frame are accessible.
- Dust high fixtures, shelves, wardrobe interiors, and skirting boards before wiping lower surfaces.
- Clean the window glass, frame, and sill, then inspect the glass from different angles for streaks.
- Vacuum the floor edges and beneath accessible furniture, where dust often gathers.
- Mop hard flooring last, using a method suitable for its material and allowing it to dry before placing items down.
Identify the bedroom floor material before choosing a cleaning method. Parquet needs different care from tile or vinyl, so avoid soaking timber or using abrasive tools. Sweep or vacuum with a suitable attachment to lift grit without scratching the finish. Clean corners, skirting edges and the space behind doors, then use a lightly damp mop only if it’s suitable for the floor.
In the living room, check beneath window ledges, along skirting boards and around built-in cabinets. Dust can settle on fan blades and high shelves, then fall onto floors after cleaning. Move lightweight items to reach the edges, and vacuum upholstered furniture if it’s already in the home. Finish with the floor so remaining debris doesn’t spread across cleaned surfaces.
If parquet has dull areas or visible scuffs beyond routine cleaning, parquet floor polishing can help restore a more even finish. For a do-it-yourself clean, keep the process simple: remove dust first, use a surface-appropriate cleaner, and let each area dry before returning belongings. A final check with daylight can reveal streaks on windows and missed dust along the room’s edges.
Kitchen cleaning and sanitisation
Start with empty cupboards and clear counters, then remove crumbs and dust before wiping. Clean from the upper cabinets down to the worktop, hob and floor. Use a fresh cloth for food-contact surfaces, and follow each cleaner’s label. Keep the sink clear as you work so removed debris doesn’t settle on cleaned areas.
Clean the refrigerator once it’s in the home. Disinfect its interior and exterior, including shelves, drawers, handles and the door seal. Remove loose parts for easier access, then dry them before replacing them. Check the folds in the seal, where crumbs and sticky residue can collect.
Use this order for appliances and surfaces:
- Remove and clean the dishwasher filter, because food scraps can remain caught inside it.
- Run a dishwasher cycle with vinegar, followed by a separate cycle with baking soda.
- Wipe the hob, control knobs, backsplash, and nearby counter, removing grease and crumbs.
- Clean cupboard handles and the inside of empty drawers, then dry surfaces before storing items.
- Finish with the sink and floor, so earlier cleaning doesn’t leave debris on the final surfaces.
Before restarting the dishwasher, check that its filter is in position. Wipe accessible edges and the inside of the door, where splashes and residue may remain. If using vinegar and baking soda, keep them to separate cycles, one after the other. Don’t combine cleaning products, and follow their labels.
Refresh the kitchen sink drain by flushing it with baking soda and vinegar in a 1:1 ratio, followed by boiling water. Clear visible food debris from the strainer first. Keep your face and hands away from the drain opening while pouring hot water, and use care around the sink basin.
Before calling the kitchen finished, inspect less obvious areas: the underside of cabinet edges, the space behind the tap, the refrigerator handle and the floor beside appliances. Wipe crumbs from drawer runners and dust from the top of the refrigerator. These small checks catch residue that a quick pass over the counters can miss.
For final sanitisation, use a product labelled for the surface and follow its directions. Keep food, utensils and clean cloths away from wet cleaning areas until the surfaces are ready for use. A clean, dry worktop and refreshed appliances leave the kitchen ready for unpacking and meal preparation.
Living areas, floors, and carpets
Begin in the living room by clearing loose items from floors and shelves. Dust ceiling fans, light fittings, curtain rails and cabinet tops before wiping lower surfaces. Clean window glass and sills, then check behind doors and beside built-in cabinets. This top-to-bottom order keeps settled dust from landing on areas you’ve already cleaned.
Entryways and shared corridors collect grit from shoes and moving boxes. Sweep the threshold, corners and edges beside the door, then wipe the door frame and reachable handles. In a common area, keep cleaning within your home’s boundaries and don’t leave water, tools or waste where people walk. Check lift lobbies or shared landings only if your move arrangements allow access.
Match the cleaning method to the floor material. Sweep or vacuum tile and vinyl to lift loose dirt, paying attention to grout lines and skirting edges. For parquet, avoid soaking the surface; use a method suited to timber and dry spills promptly. Marble also needs a compatible cleaner, since abrasive pads can mark its polished finish. Test an unfamiliar cleaner on a discreet spot first.
Use this sequence to finish each living area:
- Remove movable items and pick up visible debris, including crumbs near sofa legs.
- Dust shelves, fan blades, frames, and skirting boards before cleaning lower surfaces.
- Vacuum floor edges and accessible spaces beneath furniture, then clean the open floor.
- Allow damp flooring to dry before returning rugs, boxes, or furniture.
Carpets need a different approach from hard flooring. Vacuum slowly across the entire surface, then make another pass along edges and beneath accessible furniture. Check for stains before applying any treatment, and follow the product label to protect carpet fibres. For a deeper clean, consider a carpet-cleaning machine or carpet deodoriser. Let the carpet dry thoroughly before putting heavy furniture back.
After cleaning, run an air purifier to remove remaining dust from the air. Keep windows, shelves and floors clear while it operates, so dust is less likely to settle on freshly cleaned surfaces. For the final check, inspect the entry mat, the corners behind curtains and the area beneath the coffee table. These spots can hold grit even when the main floor looks clean.
For parquet with dull patches or marble with a worn finish, routine mopping may not restore the surface. Specialist parquet floor polishing or marble floor polishing addresses floor finishes beyond everyday dust and debris removal.
Disinfecting doorknobs
Disinfect doorknobs before unpacking, since previous occupants and movers may have handled them. Include the front door, bedroom and bathroom doors, and balcony handles. Add cupboard pulls, light switches and other frequently touched points to the same pass. Cleaning these small surfaces completes the room-by-room routine and helps prevent missed contact points.
Start by removing visible grime. Use a cloth and cleaner suitable for the handle’s material, such as stainless steel, brass or painted metal. Dirt can interfere with disinfecting, so clean the surface first if the product directions require it. Then apply a disinfectant labelled for that surface and follow its instructions, including any stated contact time.
Use this sequence to treat each handle carefully:
- Make a short route through the home, starting at the entrance and moving room by room.
- Clean the knob, lever, base plate, and the door area around the handle.
- Apply the appropriate disinfectant with a clean cloth or as the label directs.
- Keep the surface wet for the stated contact time, then let it dry as instructed.
- Change cloths between rooms or surfaces, so grime isn’t spread from one handle to another.
Focus on the parts people touch most: the top of a lever, the sides of a round knob and the thumb-turn inside a bathroom. A child’s room may also have low cupboard handles or wardrobe pulls. For sliding doors, wipe the grip and accessible track edge without flooding the mechanism.
Check the disinfectant label before use. Some products are intended for hard, non-porous surfaces, while other finishes may need a gentler cleaner. Don’t mix products or spray directly into a lock, hinge or electrical switch. Where appropriate, apply liquid to a cloth and keep the area ventilated while cleaning.
A room-by-room route helps prevent missed spots and repeated work. Keep a written list of doors, such as the entrance, bedroom, bathroom and balcony, then mark each handle once it’s clean. Inspect the cloth after each area; visible soil means it’s time to replace or rinse it as appropriate.
Finish with a final pass over shared touchpoints, including the entrance handle and any cupboard pulls used during cleaning. Avoid touching disinfected surfaces until they’ve dried as directed. If someone enters with boxes afterward, clean the handles they use again. This simple step keeps the move-in routine practical, focused and easy to follow.
Athena Team Cleaning: Office Cleaning
Athena Team Cleaning provides Office Cleaning for businesses preparing a workspace before staff and equipment move in. A planned clean can address shared surfaces and work areas before daily use begins. Building Maintenance supports ongoing upkeep, while Carpet and Rug Cleaning and Sanitization Services address specific flooring and hygiene needs.
For a residential move, use the room-by-room steps above to clean your home. For an office or shared workplace, professional cleaning can help coordinate care for floors, carpets and frequently handled surfaces. Athena Team Cleaning can support the cleaning needs of your premises.
Contact Athena Team Cleaning to discuss Office Cleaning for your workspace, or visit athenacleaningservices.sg.
Set up your new space for what comes next
Before unpacking, decide which areas need to be ready first. Prioritise the rooms you’ll use immediately, and keep cleaned surfaces clear while boxes are carried in. Coordinating arrival times with professional removal teams like letsmovelondon.co.uk can give you the necessary window to deep-clean each room thoroughly before unloading begins. A simple move-in plan also helps household members avoid tracking dust across freshly cleaned floors.
Use the pre-move in cleaning checklist as a practical handover between cleaning and settling in. Mark completed rooms, note areas that need another pass, and allow damp surfaces and carpets to dry before replacing furniture. If your move involves a workplace or more intensive floor care, Athena Team Cleaning offers Office Cleaning, Building Maintenance and Carpet and Rug Cleaning.
Choose the support that fits your space and next steps. Contact Athena Team Cleaning to discuss cleaning needs for your premises. A considered start helps make the move feel more organised, so you can settle in with confidence.
Frequently Asked Questions
What should a pre-move-in cleaning checklist include for every room?
Include surface cleaning, floor care, fixtures, windows and frequently handled points in each room. A room-by-room pre-move in cleaning checklist can also flag tasks unique to the space, such as wardrobes in bedrooms or appliance interiors in the kitchen. Add a final inspection for odours, damp patches and leftover belongings. Mark items complete only when surfaces are dry and the room is ready for furniture.
How do you deep-clean a kitchen before moving into a new home?
Deep-clean the kitchen by emptying storage, removing loose debris and cleaning from cupboards down to the floor. Include areas often skipped during a quick wipe, such as the microwave interior, extractor hood, cabinet tops and the gap beside the refrigerator. Clean removable appliance parts separately, then dry them before refitting. Finish by checking under the sink for leaks or residue, and leave counters clear until they’re completely dry.
How do you clean bathrooms, toilets, and shower areas before moving in?
Clean bathrooms using products suitable for each material, including the toilet, basin, shower and surrounding surfaces. Disinfect the toilet and consider replacing its seat before use. In shower areas, inspect the showerhead, screen edges, curtain rail and corners for residue or dampness. Use a separate cloth for the toilet, and ventilate the room while cleaning. Let surfaces dry before laying down mats or storing toiletries.
What cleaning supplies and equipment are needed for a move-in clean?
Prepare a caddy with surface-appropriate cleaners, disinfectant, microfibre cloths, sponges, a small grout brush, gloves and rubbish bags. Bring a vacuum with suitable attachments for corners and upholstery, plus a mop and bucket for compatible hard floors. A glass cloth helps reduce window streaks. Keep products in their original containers, follow label directions, and use separate cloths for kitchens, bathrooms and toilets to avoid transferring soil between areas.
What should tenants check or document before cleaning a rental home in Singapore?
Before cleaning, photograph each room in good light and record existing marks, chipped finishes, mould, pests, water stains and damaged fittings. Take close-ups as well as wider views showing where each issue is located. Note the date and keep the images with any written condition notes. Tell the landlord or property manager about urgent concerns before cleaning them, so the original condition remains clear and your work doesn’t remove evidence.
How long does pre-move-in cleaning take for different home sizes?
Cleaning time depends on the bathroom’s size, condition and number of fixtures. A dry, lightly soiled bathroom needs less work than one with heavy deposits, blocked drains or recurring mould.
Frequently Asked Questions
What should a pre-move-in cleaning checklist include for every room?
How do you deep-clean a kitchen before moving into a new home?
How do you clean bathrooms, toilets, and shower areas before moving in?
What cleaning supplies and equipment are needed for a move-in clean?
What should tenants check or document before cleaning a rental home in Singapore?
How long does pre-move-in cleaning take for different home sizes?
Related articles